

The Kiln
It’s been almost four years since I gave away my 5 cu ft gas fired Laser kiln. It had served me for fifteen years, had survived through almost 150 firings and was still in good condition (it went to one of the finalists of the first ‘Pottery Throwdown’ series). The reason for giving it away: we were moving house from Wiltshire to Warwickshire (UK) and it looked like ceramics would need to take a back seat for a while as our daughters were about to start families. (In the last five years they have produced four grandchildren for us – and my goodness do they take up a lot of time!). But almost four years without a gas fired kiln and then, a ray of hope! My wife agreed that I could have a small part of the beloved garden to build a kiln. Not wanting to miss the opportunity I set about planning my new kiln immediately. This was in July 2019.
This article is about planning and building the kiln. I have been careful to cost everything and in my case all the kiln building materials were bought new, but you can probably save a huge amount if you keep a lookout on the various pottery Facebook pages and beg steal or borrow from willing contributors. Facebook links are given at the end of each article
My first port of call was Jo Finch’s book ‘Kiln Construction – a brick by brick approach’. I have built kilns before and I used Jo Finch’s book when I built the kiln at Corsham Court while at Bath Spa University. For the current kiln I decided to modify the plans for a small soda kiln that is used as an example at the end of the book. So with that purpose in mind I knew what size the kiln would be and the likely area that it would take up.
We live on the edge of a fairly small village and luckily our garden is a fair distance from other properties. However, one of the next things to do was to tell the two closest neighbours my intentions. Its good to do this as, with a gas kiln, there will be some noise from the burners as they help the kiln reach the higher temperatures. In our previous house I once heard our closest neighbour at the bottom of the garden saying to their partner, ’What is that noise from over the wall?!’ Later in the day I went around and explained that it was a kiln and that I would fire it very infrequently. They were appeased. So if you are planning to build a kiln talk to your neighbours first, don’t give them cause to complain, and make sure they know what you are up to.
My next task was to decide where to put it. I was given a small patch that is mostly out of sight at the side of the garden. There are overhanging trees and a good strong wall next to the patch. When one neighbour knew of my intentions he kindly offered to lop a very large tree adjacent to where the kiln would be built. He was also interested in the project and has helped with the construction. At this point its also good to think about where the fuel source will be. If its a wood fired kiln you’ll need space for a stack of wood. If you’re firing by natural gas, then you need to be close to a gas supply. If, like me, you intend to fire with propane gas then you will need to store the bottles within reach of the kiln. I needed to allow space for a small store bottle store within 4m of the furthest burner port.
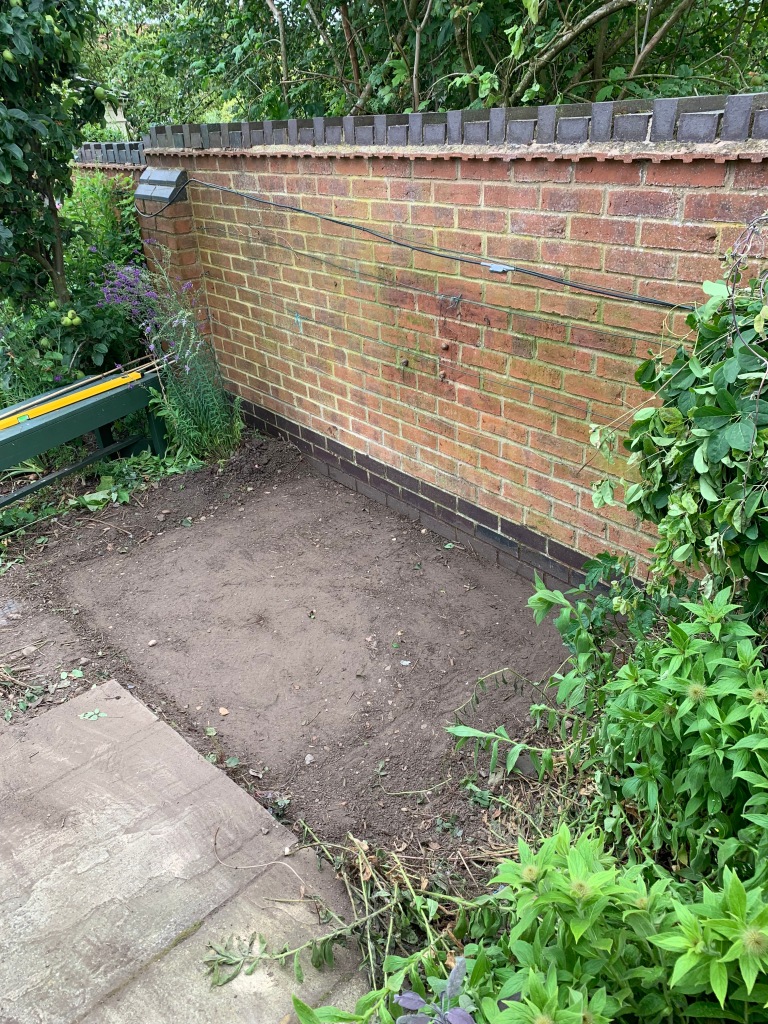
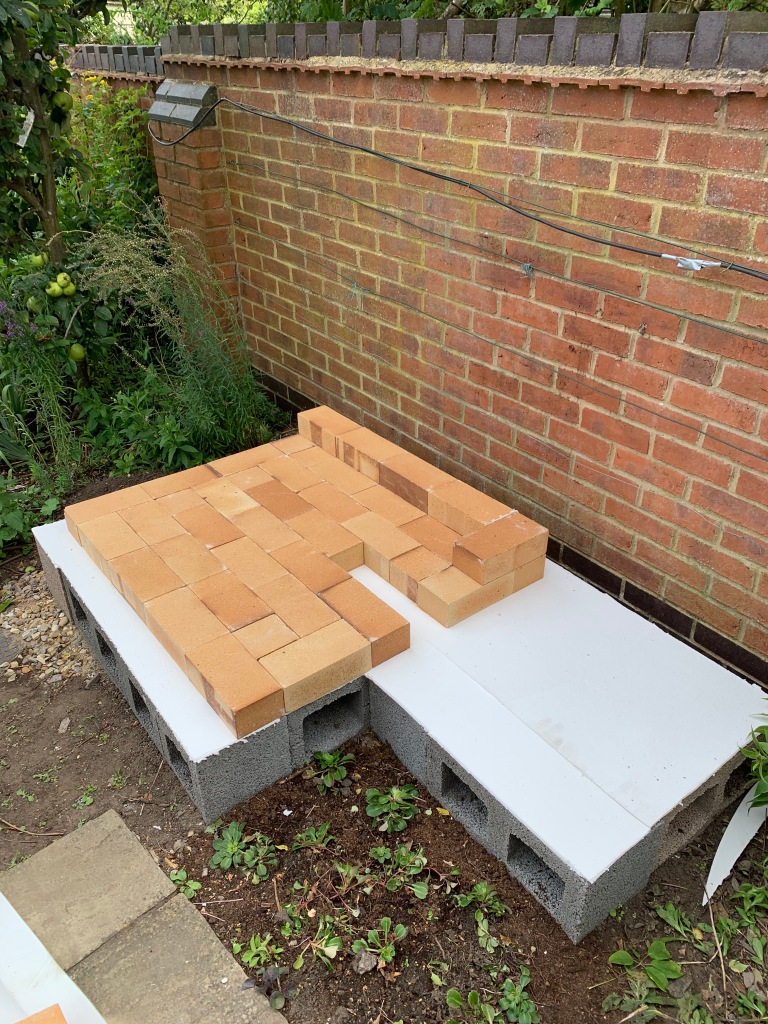
Neighbours on board, garden plants were removed and re-sited under the direction of my wife and the footprint (area) of the kiln was marked out. I dug out the ground to a depth of 10cm (4ins) and laid 5cm (2inches) of hard core in the bottom and then a further 5cm (2 inches) of gritted sand on top of it. It is very important at this point to ensure that the whole patch is level. I am lucky that the ground in my garden is very stable but it would have been better to pour a concrete base on top of the hardcore, as a foundation for the kiln. The final preparation before starting the build was to place a layer of concrete air bricks on the sand. These allow air to circulate under the kiln and help to keep the base cool and give a much more stable base – even if laid on concrete.


Total cost so far £50 for the hardcore and sand and £28 for the concrete blocks – all from the local builders merchant. You can beg steal or borrow most of these materials if your on a tight budget and so your cost so far might just be a bit of elbow grease.
Pottery Equipment For Sale and Wanted UK
https://www.facebook.com/groups/854763061350922/
Having prepared the ground and made sure the hardcore base was level I started on building the kiln. Joe Finch recommends laying 5mm of ceramic paper insulation on top of the concrete blocks before laying the firebricks for the base. I have used this process previously with success on a much larger kiln. Having researched the most appropriate material I finally went for 610 x 5mm ceramic fibre paper (£9.50 a metre) from ‘Vitcas’ (address below), which is resistant to 1260C. The purpose of the layer is to prevent the concrete blocks from becoming too hot.

For the kiln I needed two types of brick: dense firebricks and high refractory insulation bricks. Dense firebricks are for the base of the kiln up to the top of the bag wall, and for the chimney. Having consulted Joe Finch, I calculated that I needed 300 dense firebricks to achieve a 10 cu ft packing volume. New bricks are costly so its important to draw a detailed plan of your kiln and calculate the exact number of bricks you need. I used 42GD Firebricks 230 x 114 x 76mm. They were £1.29 each.
Lay the ceramic fibre paper on the concrete blocks then cover it with a layer of firebricks to the shape of the footprint of the kiln. I didn’t lay the chimney firebricks at this point as I wanted to change the Joe Finch design and add a damper at the base of the chimney in order to facilitate reduction firing. Some bricks needed to be cut and this was simply achieved by scoring the brick surface (all around) with a sharp masonry chisel and then using a bolster chisel to break the brick along the line. I needed to cut an average of two per course of bricks. There is no need for fire cement, or any other bonding agent, as the weight of the bricks keeps them in place (you will, however, need some ironwork to hold the kiln together). However, because the bricks are very slightly different in size I have used 3mm ceramic paper between some bricks to fill spaces.
Have your plan of the kiln near to hand as you will need to ensure you leave gaps for the burner ports as you build the next two courses. The fourth fifth and sixth course are all the same and then you need an extra course on the bag wall (about eight bricks) inside the kiln.


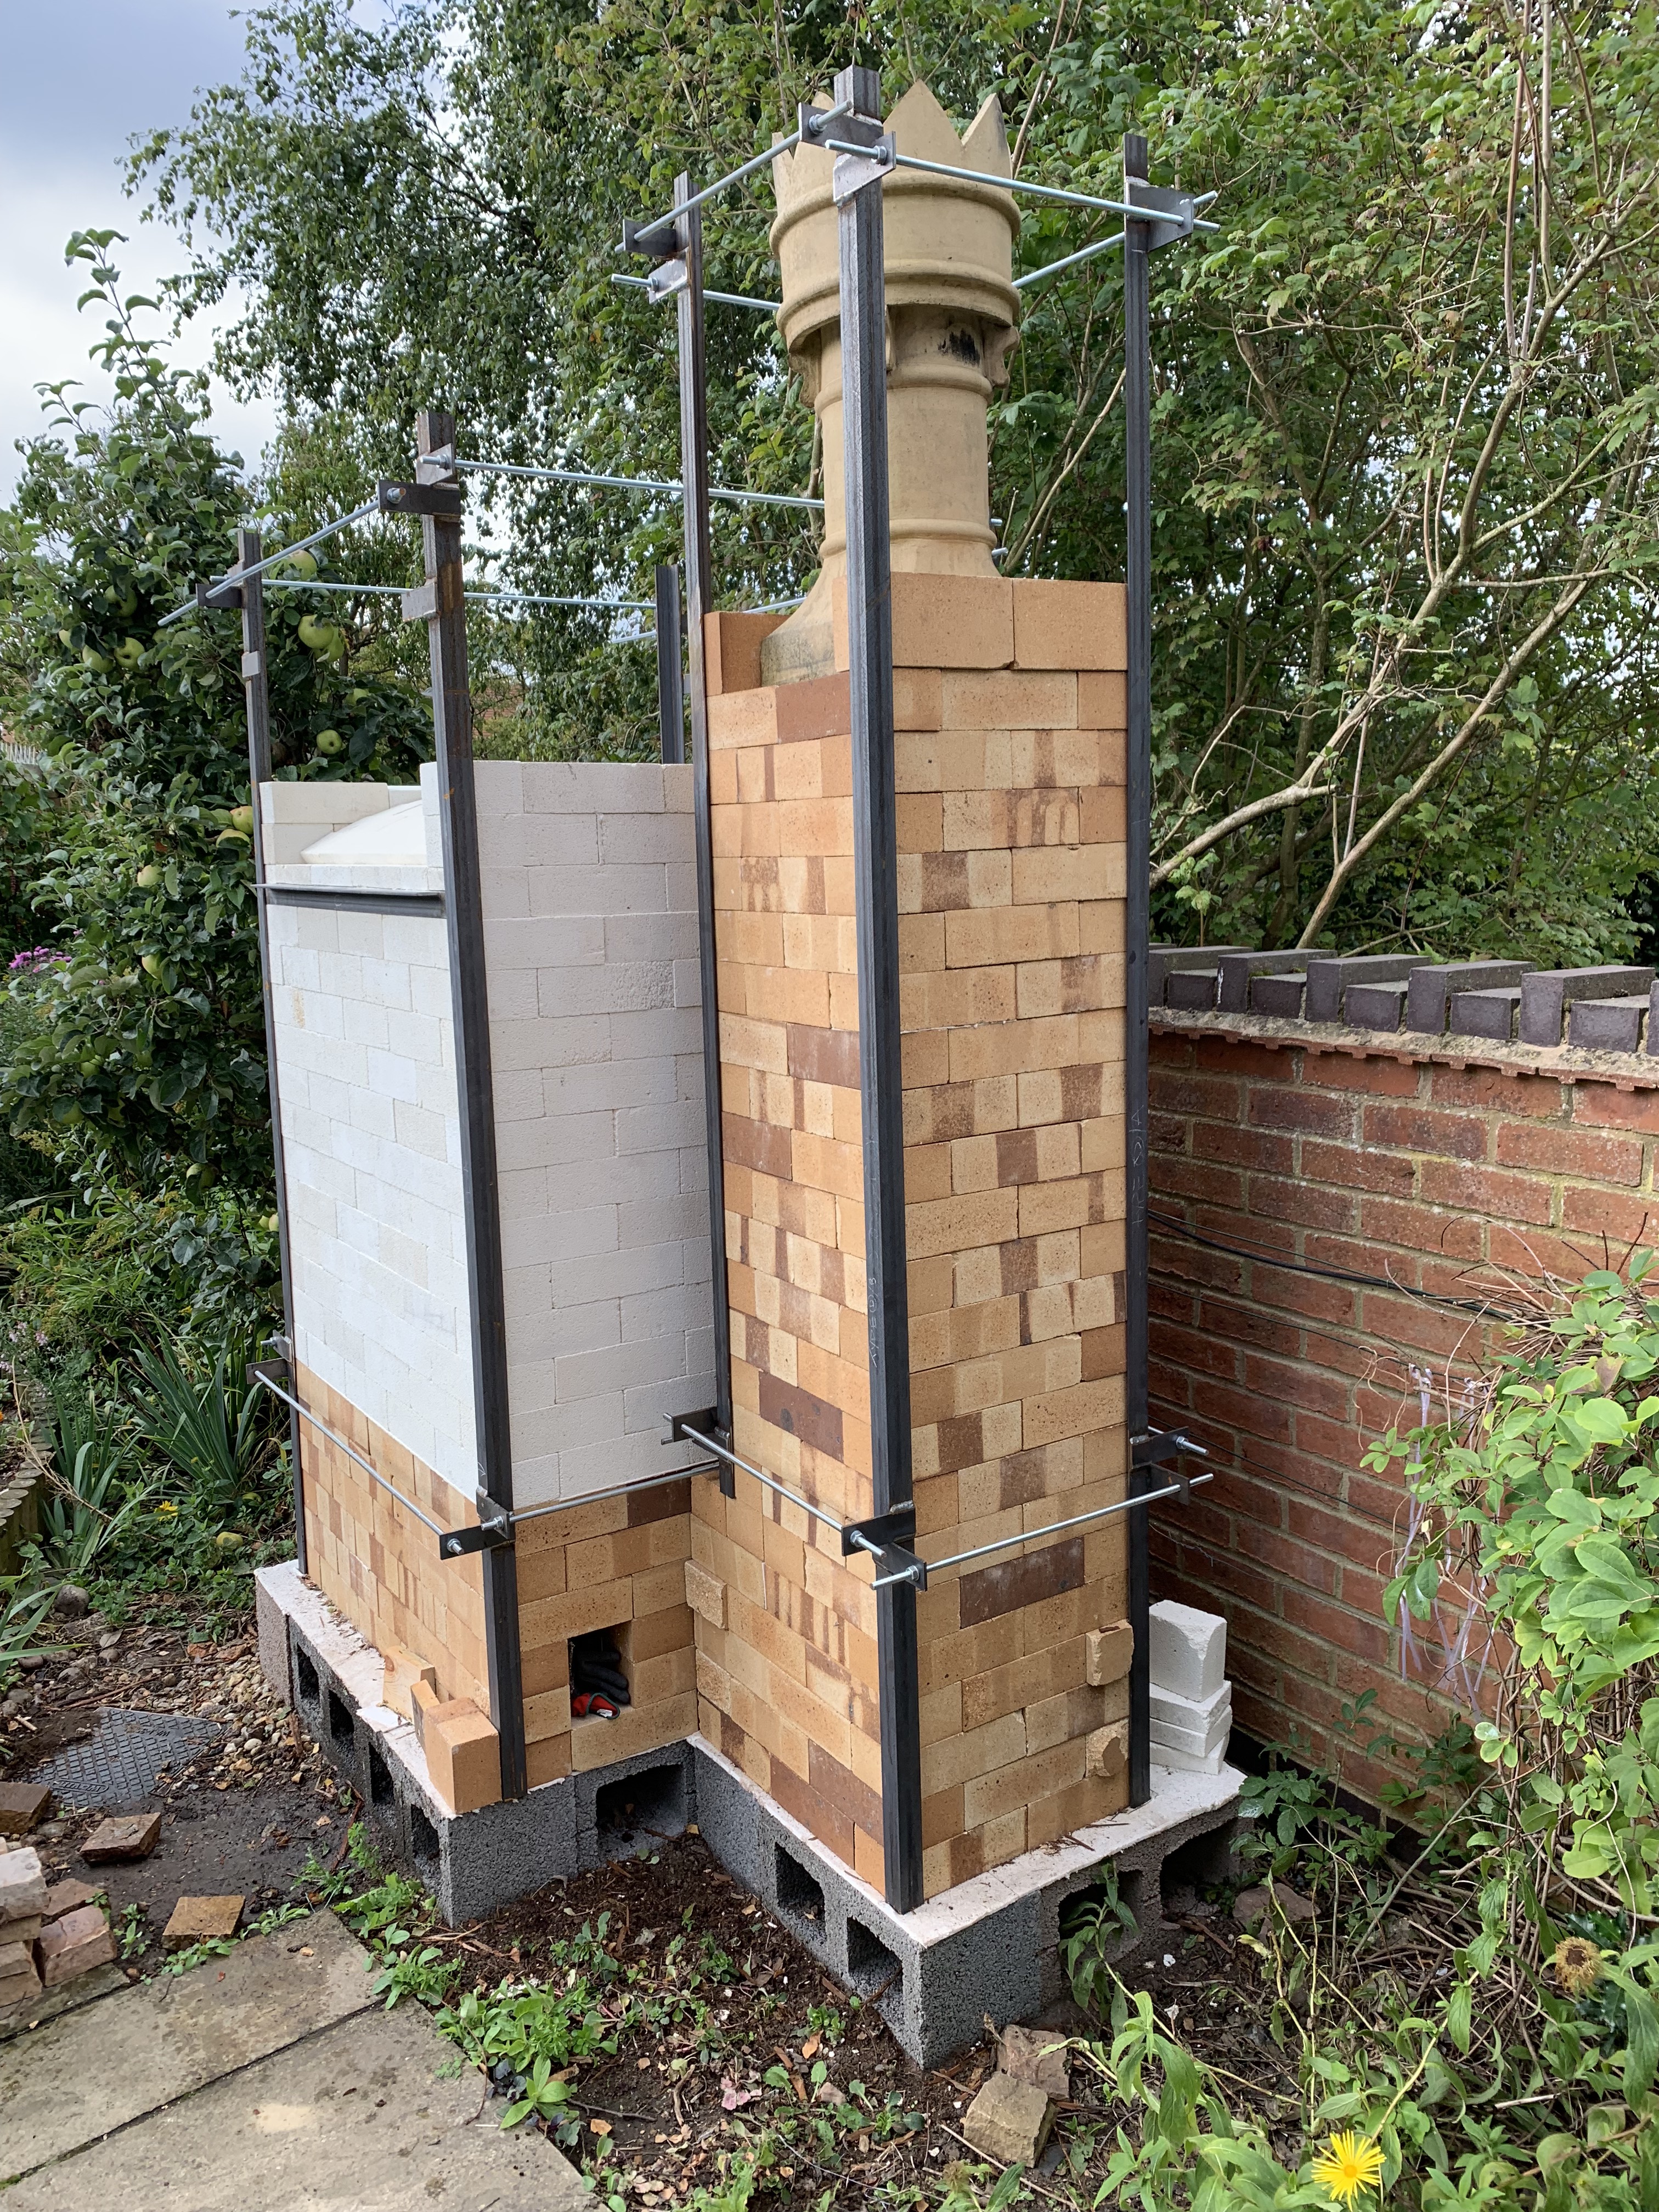
The next task is the put the ironwork in place. During the design process I worked out the height and width of the kiln. The ironwork is applied to each of the outside corner edges of the kiln and held in place with threaded tension bars, nuts and locking nuts. The tension bars need to be at least 5cm away from the face of the bricks in order to leave space for the ceramic fibre which will cover the kiln. The framework is made from 40mm angle iron. I took my drawings to a local engineering firm and they made up the framework for both the kiln and the chimney. As you can see from the picture the framework assists in the construction of the kiln as you can check the vertical as well as the horizontal levels as you progress. The more accurate you are the easier the kiln roof will be to fit. You will see from the framework that there are lugs at convenient places where the threaded tension bars are placed. Four further lugs near the top will act to contain the support bars for the sprung arch roof.
Be accurate with the dimensions of the ironwork. I made a mistake and all eight vertical bars were 30cm too long. I needed an angle grinder too cut them to size – it took almost half a day!
Next – The kiln chamber and the sprung arch roof.
Address for ceramic paper:
Vitcas Ltd, 204 – 208 Broomhill Road, Bristol BS4 5RG UK
website: https://shop.vitcas.com
Address for firebricks and insulation bricks.
Kiln Linings, Jays Refractory Specialists Ltd, Callywhite Lane, Dronfield S18 2XR UK
email: sales@kilnlinings.co.uk

Follow My Blog
Get new content delivered directly to your inbox.
